
I had never considered a washer dryer stand to be a necessity until I hit 18 weeks pregnant. Suddenly, I couldn’t bend over anymore. Shortness of breath and dizziness plagued me. When I checked out the prices of pre-built ones, Mr. P&P and I both had a small heart attack. Then, we decided to make our own DIY washer dryer stand.
Our first one was made of scrap wood and an old door, and it was awesome. Ugly, to be sure, but for the next 6 months or so, I could actually wash my clothes without feeling like I would faint or hurt myself.
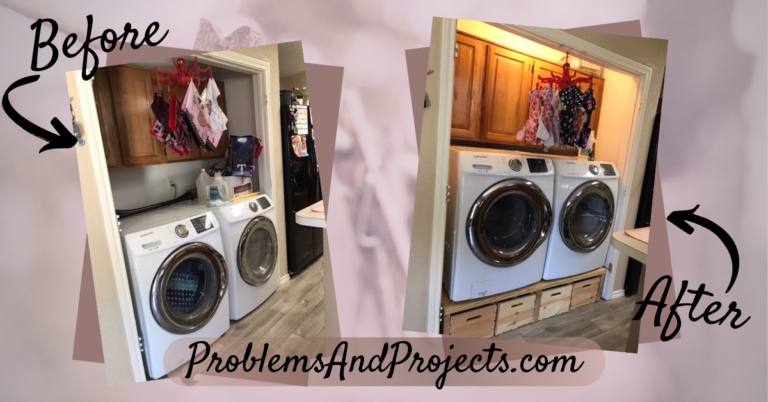
We left the old door stand at The Pit when we moved. We had neither the time nor the inclination to move it. Our new laundry room opens into a narrow space, (read our laundry room declutter post for before and after pics!) so having our machines elevated has once again made doing laundry immensely easier.
Since then, we’ve refined our DIY washer dryer stand design. Now, it’s much more practical and aesthetically pleasing. Plus, it’s only slightly more expensive than using scrap wood and an old door.
To build this DIY washer dryer stand, you’ll only need some basic tools and equipment: a level, a speed square, sandpaper, wood screws, a drill, and 3 boards of wood which the hardware store will cut if you don’t have the equipment.
Let’s get started!
Want more DIY’s and home projects? Check out these other posts!
- Foundation Repair: 7 Vital Tips You Must know
- How to Declutter Your Whole House
- Laundry Room Declutter With Me
- How To Prepare For Short Term Emergencies
Problems and Projects is a participant in the Amazon Services LLC Associates Program, an affiliate advertising program designed to provide a means for sites to earn advertising fees by advertising and linking to Amazon.com. This post may contain affiliate links through Amazon or other affiliate programs. If you make a purchase through an affiliate link, I make a small commission at no additional cost to you. All opinions are my own and I only recommend products that I believe in. Read my full disclosure here. Thank you for your support!
DIY Washer Dryer Stand Materials
When creating our DIY washer dryer stand design, we played around a lot with numbers until we found a plan that was the most affordable and left us with the smallest amount of scrap material left over.
We actually had room to make the stand several inches wider and considered using the thicker boards across the whole top (we’d do it this way next time!). Instead, we finally decided to go the highest affordability/lowest waste route. This design still works great, and now that the appliances are up there, we don’t have any problems with it.
- Just for reference, our dryer stand measured out to be 57 inches wide (144.78 cm), 27 3/4 inches deep (70.485 cm), and 12 3/4 inches tall (32.385 cm). Please measure your space BEFORE you begin, and make adjustments as necessary!
- sandpaper block
- wood screws
- a level
- a speed square
- a drill (I suppose you could use a hammer and nails, but I don’t recommend it for structural integrity and laziness reasons)
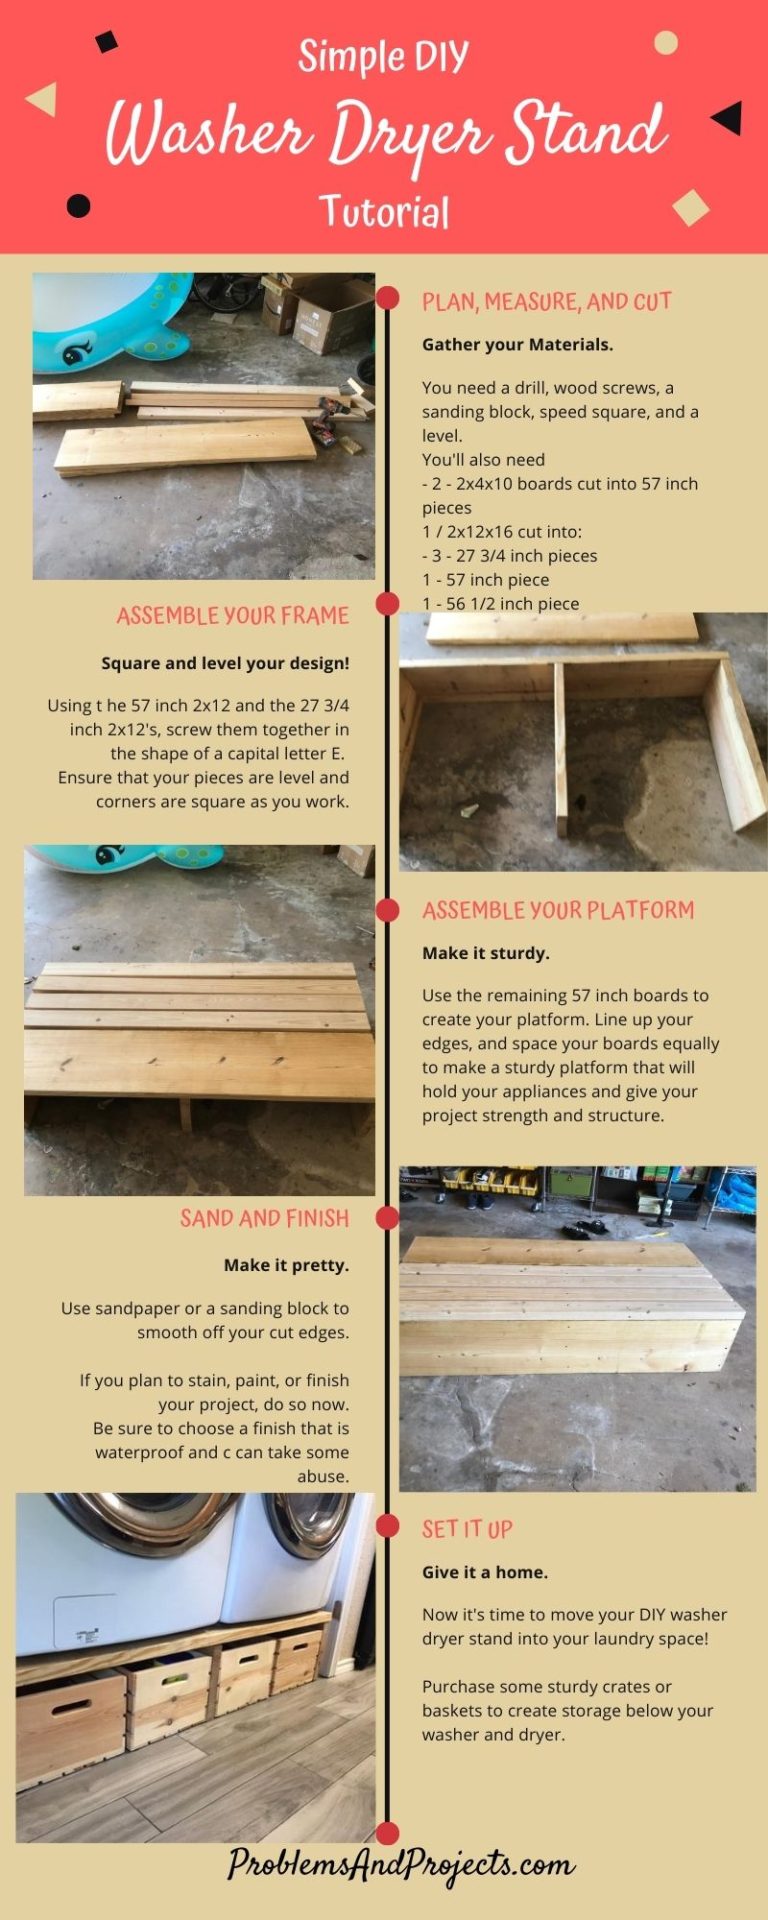
- 2 – 2x4x10 boards cut into 4 – 57 inch pieces (144.78 cm)
- 1 – 2x12x16 board cut into
- 3 – 27 3/4 inch pieces (70.485 cm)
- 1 – 56 1/2 inch piece (143.51 cm)
- 1 – 57 inch piece (144.78 cm)
You will have a small amount of scrap left from each plank.
- Wood stain, finish, or a qood quality, sturdy paint. We didn’t do this, but we might later. Probably not, though.
How to Build Your DIY Washer Dryer Stand
The assembly process is fairly simple. You just line up the parts, double check your work, and screw everything together.
1. Plan, Measure, and Cut
To begin, you’ll need to measure your own laundry space. You’ll need to know whether you plan to use these measurements or modify it to fit your space.
Once you have your measurements and plan, make a trip to your local hardware store. If you have a truck and a table saw, feel free to buy the raw materials and cut them yourself.
If, like us, you have neither, several chain hardware stores like Lowe’s and Home Depot will cut wood for you for a small fee. Then, you can load the pre-cut boards into the car, and bring them home to build your DIY washer dryer stand.
Keep in mind that each store has it’s own policy. We’ve never had trouble, but some stores might not do more than 3 cuts for you. Call and ask! Also, keep in mind that they do rough cuts on wood, so your measurements might not be exact. We had no trouble here.
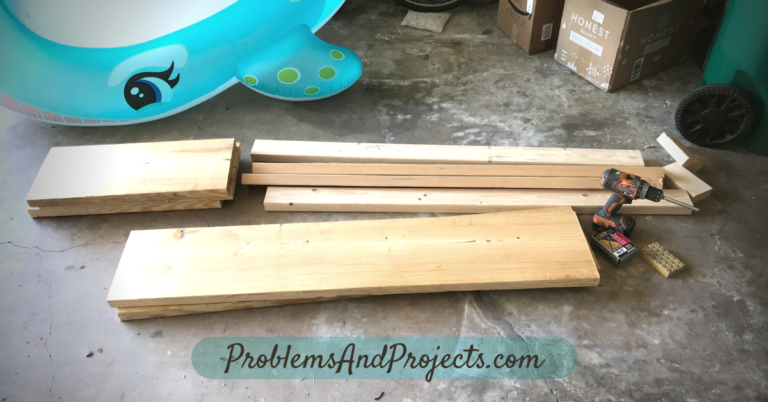
The picture below shows our raw materials laid out in the garage before we began. You can also see part of a blow up swimming pool that Baby Girl insists is actually Daisy Duck and not a whale…
2. Assemble Your Framework
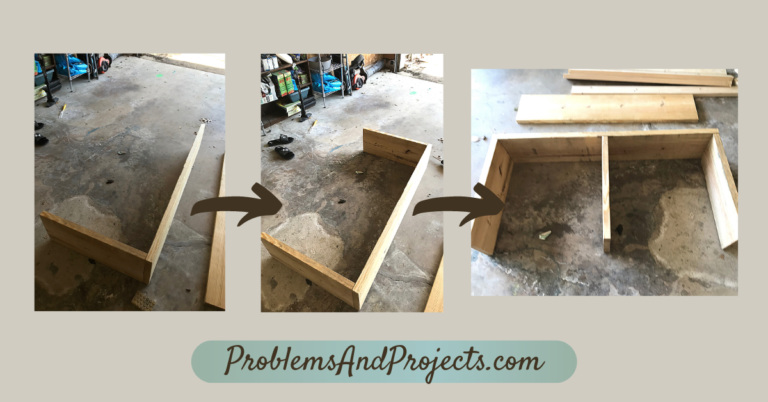
Start with the 56 1/2 inch 2×12 piece and the three smaller 2×12 pieces. You’ll screw two of the smaller 2×12 pieces to either end of the long piece, sticking outward like a boxy letter C. Then attach the third one right in the middle. Your structure should look like a capital letter E when you’re finished.
Use a speed square to help you make square corners, and be sure to check your that work is level as you work. You also need to make sure that the screws are drilled fully into the wood. If they’re breaking through the sides of the wood, it could impact your structural integrity.
Your frame should look something like the picture below.
We didn’t use brackets to secure the pieces since we plan to attach cross beams of wood on top.
3. Assemble Your Platform
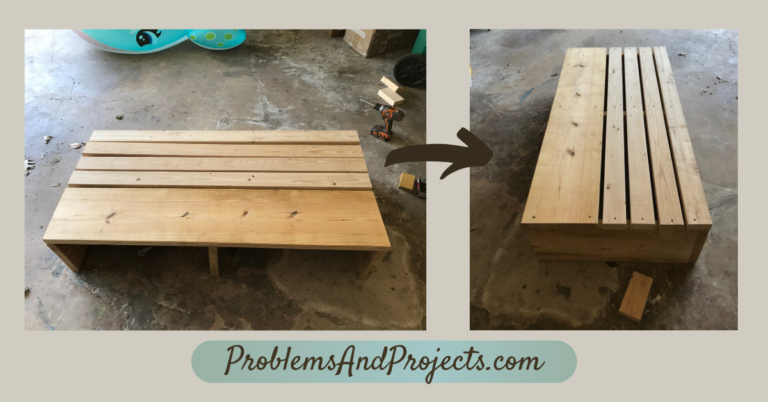
We designed our platform planks to be slightly longer than the frame, so you’ll need to make sure you center your pieces as you attach them.
Begin laying out your 57 inch 2×4 pieces and the 57 inch 2×12 piece, so you can get a feel for your final product. We chose to put our wide board in the front and the thinner boards in back.
Starting at the back, (the closed side of the E) attach one of the 2×4 pieces at the very back with screws on either end and in the middle. Make sure you screw into the framework underneath.
Then, attach the final 57 inch 2×12 board across the front (the open side of the E). This one needs two screws at each place where it meets the framework. One screw on either end of the short side of the board.
Take the remaining 2×4 pieces, and space them evenly in the space that’s left, making sure to screw into the frame below.
If we could do this over again, we would have used a little more wood to make the whole platform a closed surface! Getting the washer and dryer up on the stand took some doing in our tight space. Our initial design took into account making the least expensive stand we could with the smallest amount of scrap wood left over. If you choose to use wider or more planks to make a full platform, you’ll spend a little more and have more scrap left.
4. Sand and Finish
Finally, grab some sandpaper or a sanding block, and sand down all your cut edges to eliminate any rough spots or splinter hazards. You really don’t want to skip this step if you had a hardware store do your cuts. Their equipment isn’t designed to do clean, neat cuts, so you’ll almost certainly have rough edges.
Honestly, we just used a sanding block we had lying around the garage, but if you’re buying it, basically anything will work. Just don’t grab a super fine grit paper unless you plan sand your work multiple times, starting with coarse and moving to fine.
If you plan to stain or paint your DIY washer dryer stand, this is the time to do so! We like how the raw wood looks in our set up, and we’re kind of lazy, so we most likely won’t finish it.
Make sure you choose a durable paint or stain that can take a beating and that won’t be ruined if it gets wet. If you’re like us, you have to hook up the washer more than once and get water everywhere.
5. Set Everything Up
Now it’s time to move your handiwork into your laundry space, and hook everything back up!
The spaces below our design perfectly fit four of these wooden crates. We’re using one to store extra laundry bags, Oxi-clean, and other laundry supplies. Another crate currently holds parchment paper and aluminum foil. A third is holding a bunch of essential oil bottles I need to finish cleaning out.
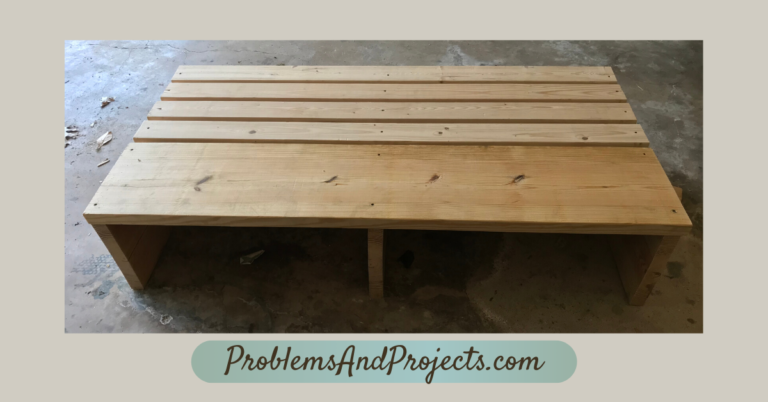
Here’s our final set up. We think it looks pretty good, and it’s way easier to do laundry in our cramped space now that we don’t have to crouch anymore!
This project really helped us clean up our laundry room and manage our clutter.
Consider Building Your Own DIY Washer Dryer Stand
Altogether, we only spend a couple of hours buying materials, building the stand, and putting it in the laundry room. It took longer to hook the washer and dryer back up again!
Our total cost was about $34 for the materials. Our store actually didn’t even charge us for cuts on this project, but it would only have added a few dollars to our total.
We already owned the screws, sandpaper, speed square, level, and drill, but even purchasing all of that (check out links in the materials section!), you can still complete the whole project for under $140.
If you have more construction skills than we do, you could embellish this design to look more finished, and I’d love to see it! I can’t help you with it, though. We only get to use those tools with close adult supervision.
Don’t forget to pin the picture tutorial below, and save this post for later! Also, remember to subscribe to our newsletter, and get regular updates about what’s going on at Problems and Projects.


930012 427204Some genuinely marvellous work on behalf with the owner of this internet website, utterly outstanding content material. 673605
734556 566066I enjoy this web site, will surely arrive back. Make sure you carry on writing high quality posts. 977301
Great job! Did you seal the stand? If so, what did you use? Thanks!
Thanks! We actually kept it unsealed for the sake of time and expense. We haven’t had any issues yet with it being unsealed despite the washer immediately leaking all over it.
This is so amazing!
Thanks!
It’s really a great idea…..
Thank you for sharing this post 😇
JENISH | https://knowafactfromj.blogspot.com
Thanks!
That is definitely not a diy for me. Lol. But i do love it .
Great idea!
It’s not for everyone, and that’s ok!